
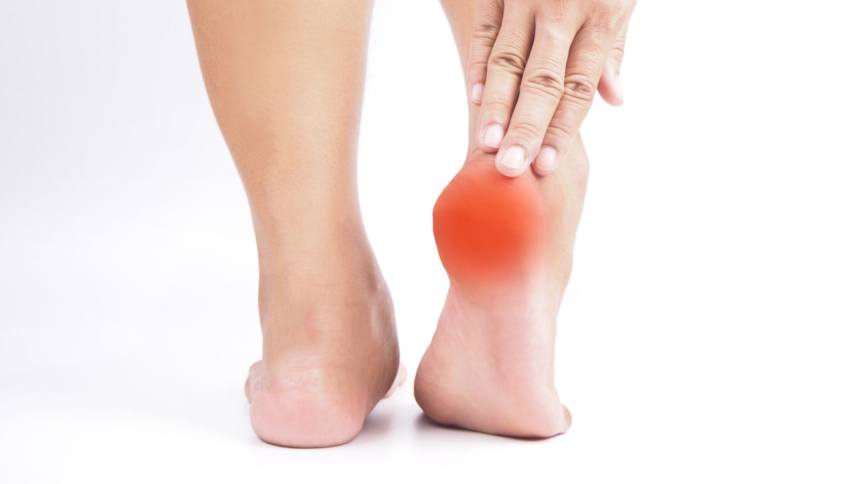
Wedding season is a time of joy, celebration, and long hours on your feet. Whether you’re dancing at a sangeet, standing through ceremonies, or rushing around in heels, you might notice discomfort or pain in your heels. This pain could stem from plantar fasciitis, tight calf muscles, or simply overuse. The good news? Yoga offers gentle, effective ways to relieve heel pain, improve flexibility, and strengthen the muscles supporting your feet. Below, we explore the causes of heel pain during wedding season and share yoga poses to help you find relief.
Why Do Your Heels Hurt During Wedding Season?
Heel pain is often caused by:
- Prolonged Standing or Walking: Wedding events often involve hours of standing, walking, or dancing, putting stress on your heels.
- High Heels: Wearing heels shifts your body weight forward, straining the plantar fascia and Achilles tendon.
- Plantar Fasciitis: Inflammation of the plantar fascia, the tissue connecting your heel to your toes, is a common cause of heel pain.
- Tight Calves and Achilles Tendon: Limited flexibility in these areas can pull on the heel, causing discomfort.
- Overuse or Fatigue: Constant movement without rest can lead to muscle fatigue and strain.
Yoga can address these issues by stretching tight muscles, improving circulation, and strengthening the feet and ankles. Below are five yoga poses to help alleviate heel pain and keep you comfortable during wedding season.

Yoga Poses to Relieve Heel Pain
1. Downward-Facing Dog (Adho Mukha Svanasana)
Benefits: Stretches the calves, hamstrings, and Achilles tendon, relieving tension that contributes to heel pain.
How to Do It:
- Start on your hands and knees, with wrists under shoulders and knees under hips.
- Tuck your toes, lift your hips up and back, forming an inverted “V” shape.
- Press your heels gently toward the floor, feeling a stretch in your calves and Achilles tendon.
- Keep your knees slightly bent if your hamstrings or calves are tight.
- Hold for 5–8 breaths, then release.
Tip: Focus on lengthening your spine and pressing evenly through your hands and feet to avoid strain.
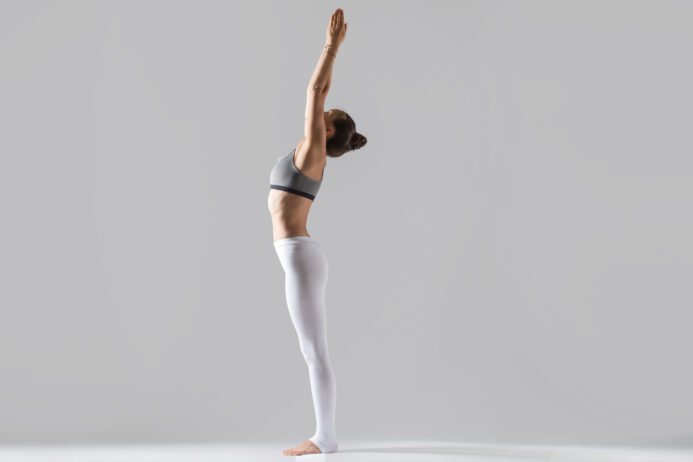
2. Seated Forward Bend (Paschimottanasana)
Benefits: Stretches the calves, hamstrings, and lower back, reducing tension in the plantar fascia.
How to Do It:
- Sit on the floor with your legs extended straight in front of you.
- Inhale, lengthen your spine, and reach your arms up.
- Exhale, hinge at your hips, and reach for your toes or shins, keeping your spine straight.
- Flex your feet to engage the muscles in your legs and stretch the soles of your feet.
- Hold for 8–10 breaths, then slowly release.
Tip: Use a strap around your feet if you can’t reach your toes comfortably.
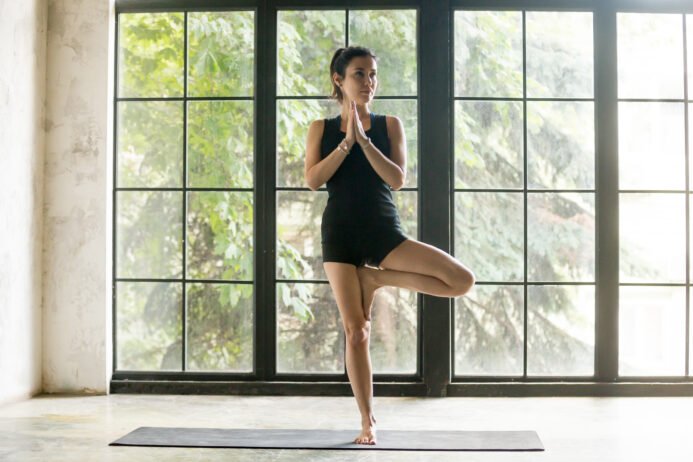
3. Garland Pose (Malasana)
Benefits: Opens the hips, stretches the ankles, and strengthens the feet, improving overall foot mobility.
How to Do It:
- Stand with your feet slightly wider than hip-width apart, toes pointing slightly outward.
- Lower into a deep squat, keeping your heels on the ground if possible (place a folded blanket under your heels if they lift).
- Bring your palms together at chest level and press your elbows against your inner knees.
- Lengthen your spine and hold for 5–8 breaths.
- To release, place your hands on the floor and slowly stand up.
Tip: This pose also helps improve balance and reduce strain from wearing heels.
4. Toe Squat
Benefits: Stretches the toes, arches, and plantar fascia, directly targeting heel pain.
How to Do It:
- Kneel on the floor with your knees together.
- Tuck your toes under (including the pinky toes) and sit back on your heels.
- Keep your spine straight and hands on your thighs or the floor for support.
- Hold for 1–2 minutes, breathing deeply. If the stretch is too intense, lean forward slightly.
- Release by lifting your hips and untucking your toes.
Tip: Start with shorter holds if this feels intense, gradually increasing the duration.
5. Legs-Up-the-Wall Pose (Viparita Karani)
Benefits: Improves circulation, reduces swelling in the feet, and relaxes the lower body.
How to Do It:
- Sit close to a wall and swing your legs up so your heels rest against the wall.
- Lie back on the floor, keeping your legs straight and relaxed.
- Place your arms by your sides or on your belly, and close your eyes.
- Stay in the pose for 5–10 minutes, breathing slowly and deeply.
- To exit, bend your knees, roll to one side, and slowly sit up.
Tip: This restorative pose is perfect for relaxing after a long day of wedding festivities.
Additional Tips to Prevent and Manage Heel Pain
- Wear Supportive Footwear: Opt for shoes with good arch support and cushioning when possible. If you must wear heels, choose lower, wider ones to reduce strain.
- Massage Your Feet: Use a tennis ball or your hands to massage the soles of your feet, focusing on the heel and arch.
- Stay Hydrated: Proper hydration supports muscle and tissue health, reducing the risk of cramps and inflammation.
- Rest and Recover: Take breaks during events to sit and elevate your feet to reduce swelling.
- Incorporate Yoga Regularly: Practice these poses 3–4 times a week to maintain flexibility and strength in your feet and legs.
When to See a Doctor
If heel pain persists despite rest and yoga, consult a healthcare professional. Persistent pain could indicate conditions like plantar fasciitis, heel spurs, or other issues that require medical attention. A doctor or physical therapist can provide tailored advice or treatments like orthotics.
Conclusion
Wedding season doesn’t have to mean sore heels. By incorporating these yoga poses into your routine, you can stretch and strengthen the muscles in your feet and legs, improve circulation, and reduce pain. Practice these poses mindfully, listen to your body, and pair them with smart footwear choices for a pain-free, joyful wedding season. Namaste!